How to use your test kit
A step-by-step guide

The test kit contains six cheek swabs, six collection tubes and a reseal sticker.
Plus extra for spares
Check your kit

Before you start
You will collect up to 6 samples in one day at 3-hour intervals starting when you wake, until you go to bed.
Wash your hands before and after samples are taken

Step 01
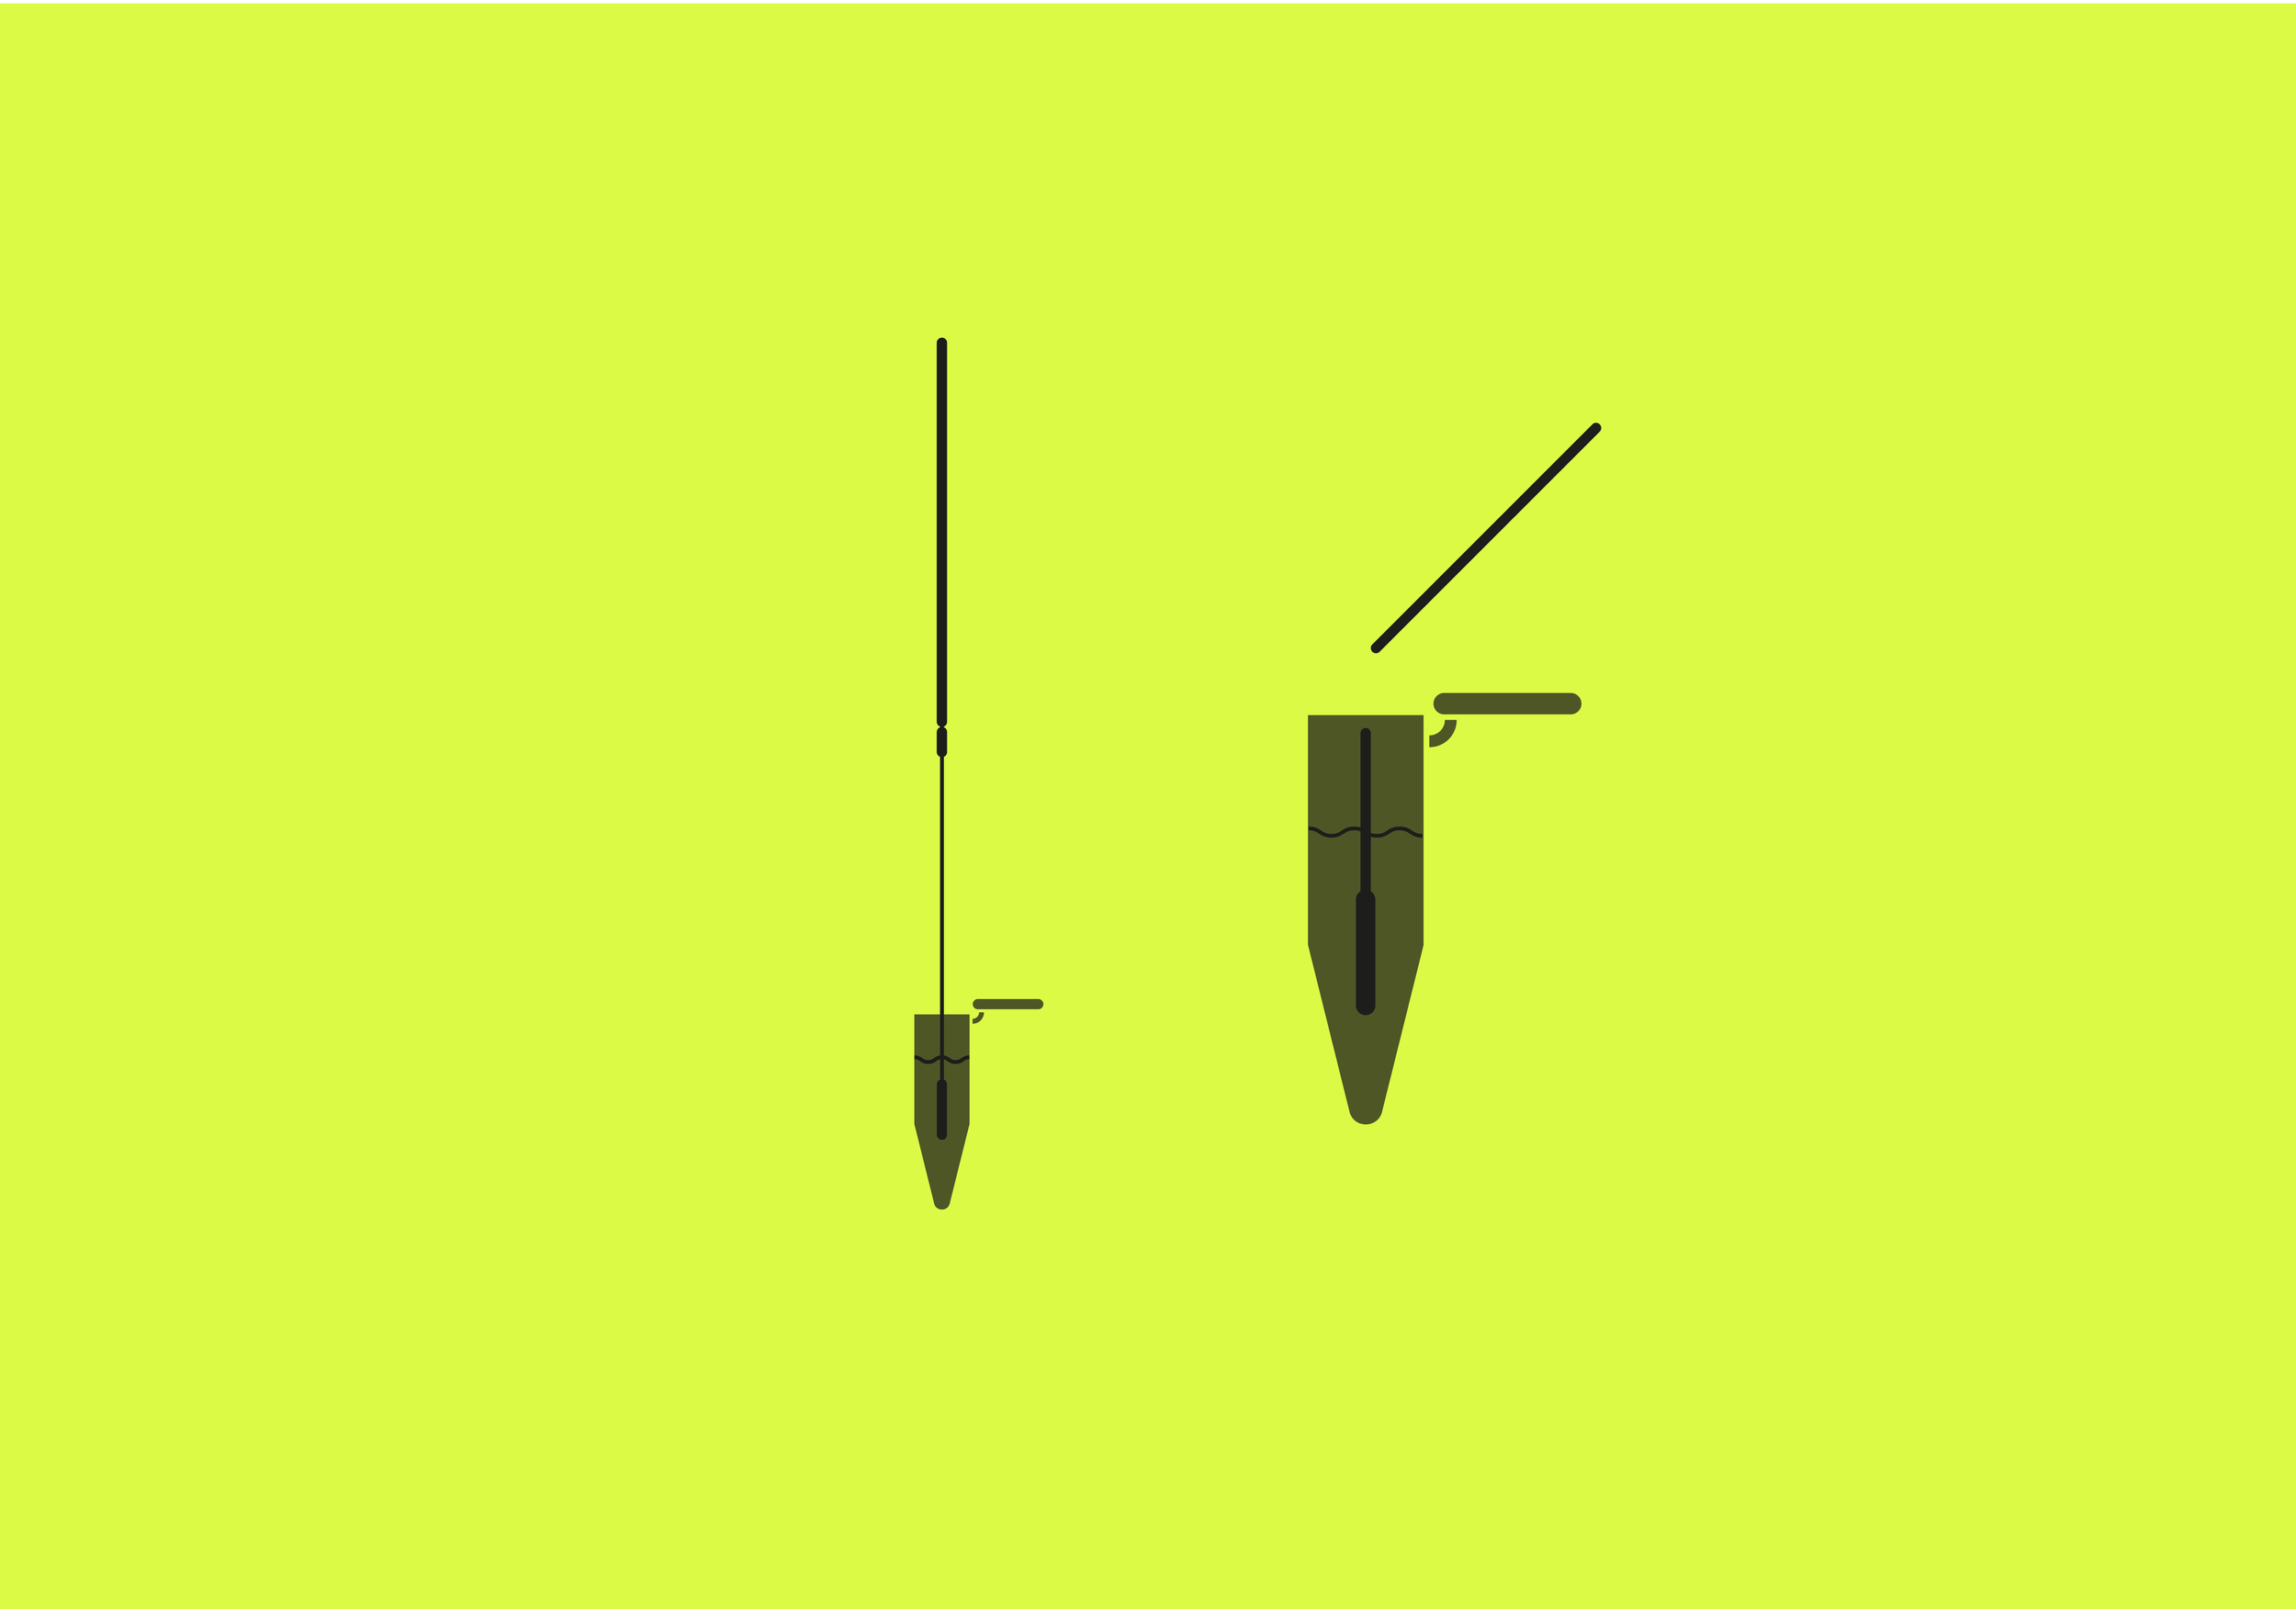
Start with the red tube
Open and place the tube in a tube holder
Take a clean swab out of the wrapper without touching the tip with your fingers, insert the tip into your mouth and rub firmly against the inside of both cheeks for 1 minute.

Step 02
Take the opened tube and swirl the tip of the swab in the liquid for one minute, snap the tip into the tube (optional).
Close the tube, by pressing the lid tightly until it clicks.
Step 03
Place the tube back into the tray. Write the sample collection time on the tray by the tube.
Repeat steps above at three hourly intervals up to six times in one day. Use a clean tube for each sample according to the colours.
Made a mistake? Use the spares to take a new sample, note the new time and place them where the original tube should go.

Step 04
Seal the box using the sticker provided.